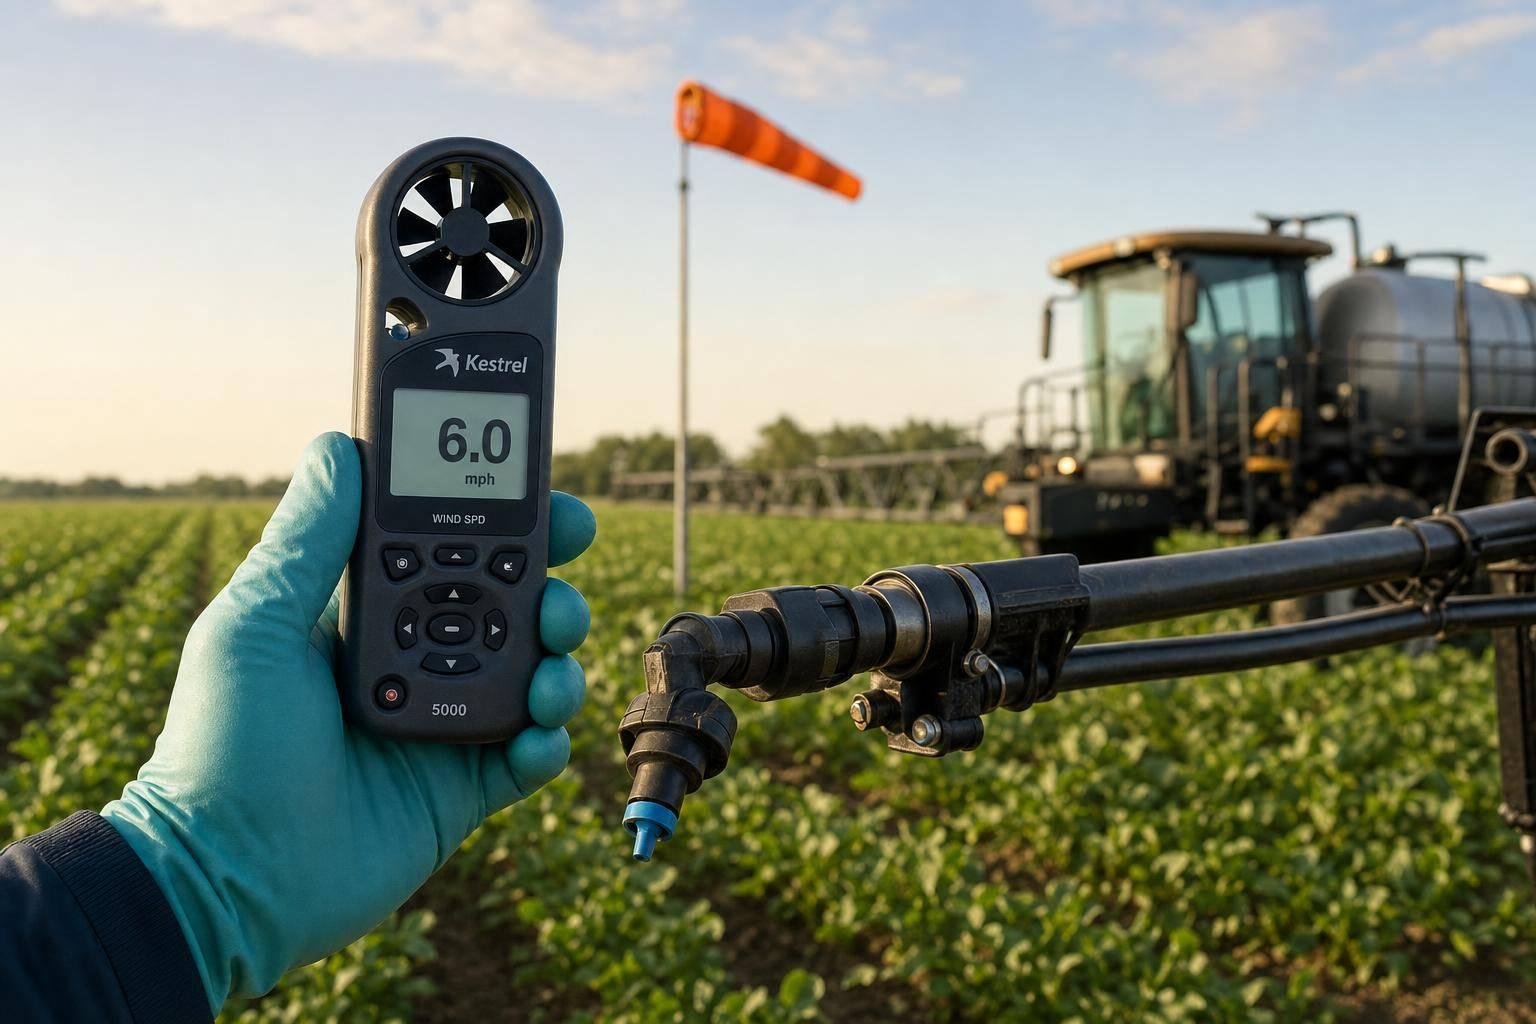
If I had to boil it down to one rule, it’s this: I read the label first, then I spray only when field wind is in range. For most ground work, 3–10 mph is the usual target, 0–2 mph can signal inversion risk, and over 15 mph is often a stop point. Drift can spike fast too – one source cited in the article says doubling wind speed increased drift by nearly 700% at 90 feet downwind.
Before I spray, I keep the decision simple:
- Check the product label first. The label is the law.
- Measure wind at the field, not from an app.
- Watch both speed and direction. A safe speed is not safe if wind is blowing toward homes, water, or sensitive crops.
- Avoid dead calm, gusts, and inversion signs like horizontal smoke or ground fog.
- Keep records of wind readings, shifts, and pauses.
- Use drift-control steps like lower boom height, coarse droplets, and slower travel speed.
A few field numbers stand out:
- 3–10 mph: best range for many ground applications
- 10–15 mph: check the label and use extra care
- >15 mph: stop in many cases
- 18–36 inches: check wind near nozzle height
- 24 inches: common boom-height target
- <45 psi: pressure limit noted for drift control
- <10 mph travel speed: helps cut boom bounce and turbulence
- 250–300 feet: buffer to consider when wind moves toward a sensitive area
Here’s the short version I’d want before heading to the field: wind speed alone does not make the call. Direction, gusts, inversions, boom height, and recordkeeping all shape whether I spray, wait, or stop.
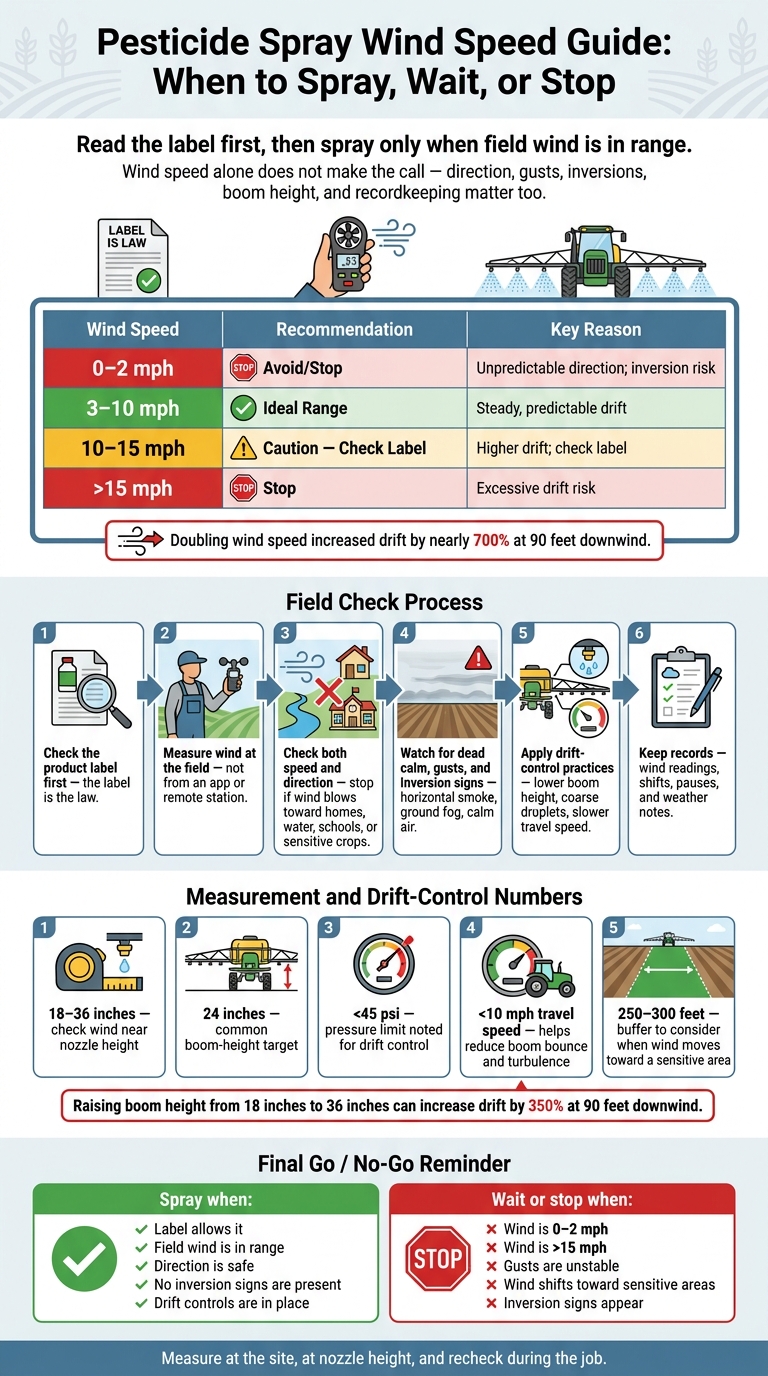
Pesticide Spray Wind Speed Guide: When to Spray, Wait, or Stop
Dicamba and 2,4-D drift: wind speeds and temperature inversions
sbb-itb-c4006de
Wind Speed Limits: Recommended Ranges and When to Stop Spraying
Wind limits change based on the product label and the way you’re applying it, so start with the label every time. Once that’s clear, wind becomes the first field check that shapes the go/no-go call. And when it’s time to decide, use the reading at the site – not the forecast.
Best Wind Speed Range for Most Ground Applications
For most ground applications, 3–10 mph is the preferred window. A light, steady breeze in that range helps move spray droplets in a more predictable direction. That makes off-target movement less likely and keeps drift easier to control.
Below 3 mph, things get trickier. Wind direction can shift or become hard to read, and the risk of an inversion goes up. Calm air may sound safe, but it isn’t a safe default. Small droplets can hang in the air and move sideways in ways that are hard to predict or manage.
When to Delay or Stop an Application
Wind direction matters just as much as wind speed. If the wind is pushing spray toward homes, schools, water, or sensitive crops, stop the application.
Here’s the quick breakdown:
| Wind Speed (mph) | Recommendation | Key Reason |
|---|---|---|
| 0–2 mph | Avoid/Stop | Unpredictable direction; inversion risk |
| 3–10 mph | Ideal Range | Steady, predictable drift |
| 10–15 mph | Caution – Check Label | Higher drift; check label |
| >15 mph | Stop | Excessive drift risk |
Gusty or unstable conditions are another red flag. Even if the average wind speed looks fine, uneven wind can change the job fast. That’s why the next step is to verify wind speed and direction at the application site with a handheld anemometer.
How Label-Specific Wind Limits Affect Your Decision
General guidance often points to 10 mph as a common upper limit, but labels don’t all say the same thing. Some, like Pennsylvania applicator requirements, are stricter. Others allow up to 15 mph if required drift-reduction practices are in place.
Check the label before mixing. It overrides general guidance. If the label is stricter than the general rule, the label controls the job.
How to Measure Wind Speed Correctly in the Field
Once the label gives you the limit, the next step is simple: measure wind where you spray. A phone forecast or a reading from a weather station miles away can miss what’s happening in the field. Trees, sheds, slopes, and other nearby features can all change how wind moves at the spot where droplets are released.
Use a Handheld Anemometer at the Application Site
Check wind at the spray site itself, not from a forecast or remote station. A handheld anemometer gives you the number that matters most: the one at the point of application.
Hold the anemometer at nozzle height, usually 18–36 inches above the target or canopy. That height matters more than it may seem. Raising a spray boom from 18 inches to 36 inches can increase drift by 350% at 90 feet downwind. That’s why the reading should match the release height as closely as possible.
Take readings in open ground and stay away from obstructions that can skew the result.
Use that site-level reading to decide whether to spray, wait, or shut the job down.
Check Wind Speed and Direction Throughout the Job
A single reading at the start doesn’t tell the whole story. Wind can shift while you’re spraying, so check both speed and direction at the start, middle, and end of the application, and more often when conditions are changing.
"Check wind direction and speed when starting to spray a field and continue to monitor while spraying."
If gusts pick up or the wind starts moving in a new direction, recheck right away.
Watch for Calm Air, Gusts, and Temperature Inversions
Dead calm isn’t always safe. In some cases, it can point to a temperature inversion. When that happens, droplets stay suspended near the ground and can drift off target.
Before spraying, look for warning signs such as:
- Horizontal smoke patterns
- Ground fog in low-lying areas
- Dead calm conditions
During an inversion, sound tends to travel farther, and odors may seem stronger because the air is layered. If you notice those changes, stop and check conditions again.
Log each reading and note any wind shifts as part of your pesticide safety protocols so there’s a clear record of why you kept going, paused, or stopped.
Drift Management and Recordkeeping for Wind Limit Compliance
Once wind is inside the label limit, the next part is all about how you spray and what you record. That’s what drives compliance and helps cut drift.
Application Practices That Reduce Drift
After you confirm wind is within the label limit, set up your equipment and spraying method to keep droplets where they belong. This starts with nozzle selection and field setup.
Use drift-reducing nozzles, keep pressure below 45 psi, and hold travel speed under 10 mph. When pressure goes up, droplets get finer, and finer droplets move off target more easily. Keeping speed below 10 mph also helps reduce boom bounce and spray turbulence. Set boom height near 24 inches above the canopy. If wind is blowing toward a sensitive area, widen the buffer to 250–300 feet or wait to spray.
What to Include in Pesticide Application Records
Record the same field conditions that shaped your go/no-go call. Good records can make a big difference if a drift complaint comes up later.
At a minimum, document:
- Date, start time, and stop time
- Site location and product name, including EPA registration number
- Wind speed and direction readings taken at the application site
- Any weather changes, gusts, or direction shifts that caused a pause
- Notes on inversion signs such as ground fog, dew, frost, or horizontal smoke
Some product labels, especially certain dicamba formulations, limit spraying to set time windows, such as one hour after sunrise to two hours before sunset. If your label includes a time limit, log that too.
Wind Speed Decision Table by Application Scenario
Use the table below as a quick field check when conditions are shifting.
| Application Method | Typical Wind Limit | Key Drift Management Practice |
|---|---|---|
| Ground Boom | 10–15 mph (label-dependent) | Keep boom height near 24 inches, use coarse droplets, and keep travel speed below 10 mph. |
| Aerial | Strict label limits | Specialized training required; highly susceptible to even light wind drift; follow swath displacement and buffer requirements. |
| Orchard / Vineyard | 10 mph | Adjust airblast settings; spray inward from the perimeter; monitor temperatures above 85°F. |
Conclusion: Start With the Label and Check Wind Conditions on Site
Use this final rule to make the spray call: read the label first, then confirm the wind at the site. For most ground applications, 3–10 mph is the practical target.
Before spraying, check nearby sensitive areas such as crops, water, and residences.
Measure wind with a handheld anemometer at nozzle height at the application site. As you work, log wind speed, wind direction, and any changing conditions in your application record. If the wind shifts toward a sensitive area, stop and recheck before moving on.
FAQs
Why is dead calm risky for spraying?
Dead calm can point to a temperature inversion. That happens when a layer of warm air traps cooler air close to the ground.
When that sets in, small pesticide droplets may hang in the air instead of settling on the target. And once they stay suspended, they can drift long distances in hard-to-predict directions.
Very light winds, around 0–2 mph, can cause trouble too. They often shift direction and behave erratically, which makes spray placement less precise and drift harder to manage.
How often should I recheck wind in the field?
Check wind speed and direction in real time across the entire application. Conditions can shift within minutes, especially near sunrise or sunset.
Be ready to stop spraying or change buffer zones right away if wind speed goes past safety limits or starts moving toward sensitive areas. Use a reliable handheld anemometer at the point of spray release.
What should I do if wind shifts mid-application?
Stop spraying at once and check conditions again before you keep going. If the wind has turned toward sensitive areas, put the application on hold or, if the product label allows it, increase buffer zones.
Since wind direction can shift within minutes, watch conditions in real time during the entire application.