The 1/128th rule simplifies backpack sprayer calibration by linking ounces directly to gallons per acre (GPA). By spraying a test plot of 340.3 square feet (1/128th of an acre), the liquid collected in ounces equals your GPA – no complex math required. For example, if you collect 30 ounces, your application rate is 30 GPA.
Why it matters? Accurate calibration saves money, ensures proper pesticide use, and avoids waste. A study found only 11.25% of applicators hit their target rates within 10%, highlighting the importance of this method.
Key steps:
- Mark a 340.3 sq. ft. test plot (18.5 ft x 18.5 ft).
- Use clean water for calibration.
- Walk at a steady pace while spraying.
- Measure liquid collected in ounces to determine GPA.
- Adjust pressure or nozzle if rates are off.
Proper calibration avoids overuse, ensures compliance, and improves effectiveness for pest control professionals. Equip yourself with tools like a measuring tape, stopwatch, and pressure gauge to make the process smooth and accurate.
Equipment and Materials Needed
Required Tools and Their Uses
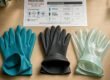
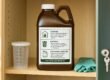
To properly calibrate your backpack sprayer, you’ll need a few essential tools and materials. Start by inspecting your sprayer for leaks, ensuring the pump works correctly, and confirming that strainers are clean. Always use clean water during calibration – not only for safety but also to avoid wasting product.
You’ll need a measuring tape to mark out your test plot, which is typically a square area measuring 18.5 feet by 18.5 feet. To clearly define this plot, use stakes, string, or flags. A stopwatch or timer is also crucial for timing your walk through the plot and recording the spray collection period.
A graduated measuring container marked in fluid ounces is another must-have. This tool helps you determine your spray application rate in gallons per acre with ease.
For consistent and accurate calibration, keep the following items on hand:
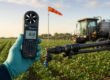
- A pressure gauge or regulator to ensure your sprayer maintains a steady output. If your sprayer doesn’t have one, consistent manual pumping is essential.
- A calculator for any necessary math during the process.
- Replacement nozzles in case your current nozzle is worn out or produces an uneven spray pattern. It’s important to replace nozzles if their discharge rate deviates by more than 10% from the manufacturer’s specifications.
Having these tools ready will make the calibration process smoother and ensure accurate results.
sbb-itb-c4006de
Backpack Sprayer Calibration: 1-128th Worksheet
How to Calibrate a Backpack Sprayer
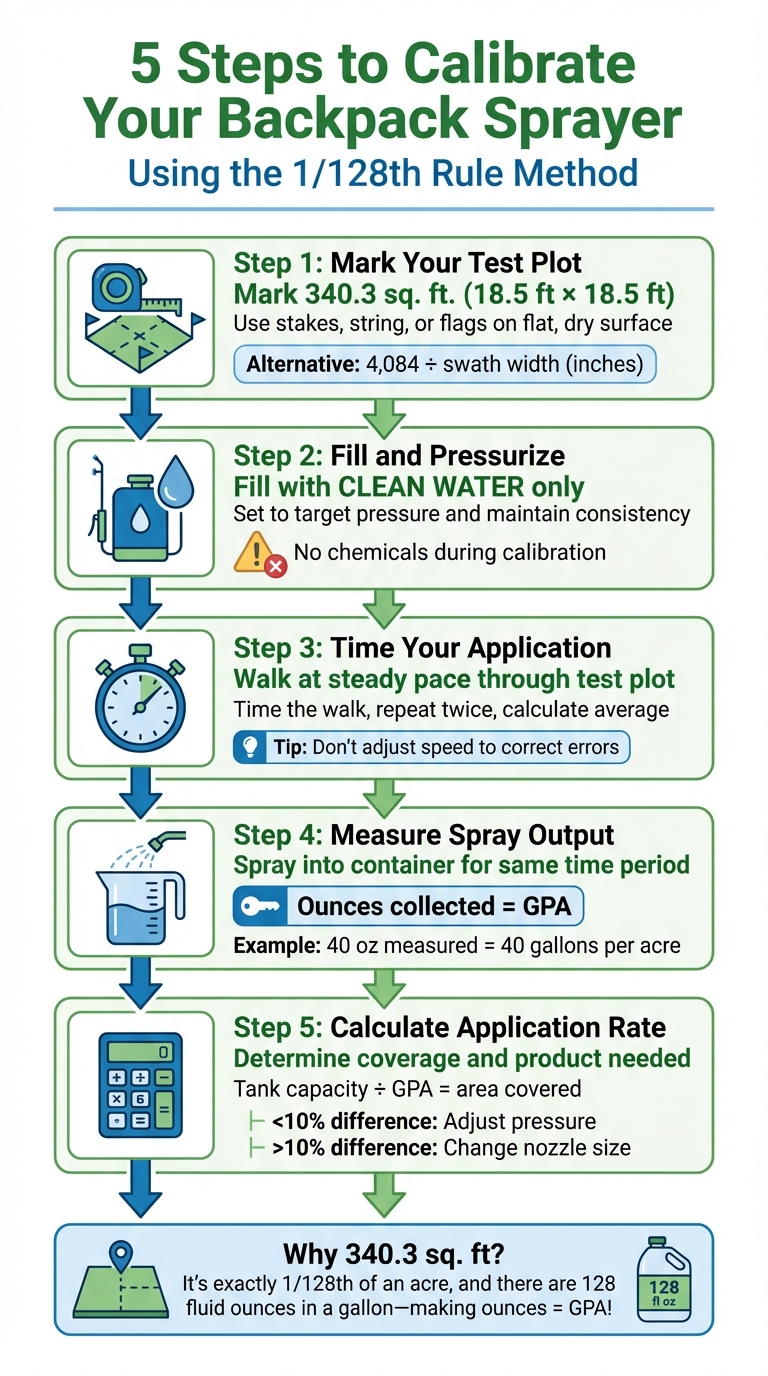
5-Step Backpack Sprayer Calibration Process Using the 1/128th Rule
Step 1: Mark Your Test Plot
Start by marking out a test plot of 340.3 square feet. A simple way to do this is by creating a square that measures 18.5 feet by 18.5 feet. If you’re working with a different swath width, you can calculate the necessary travel distance using this formula: 4,084 ÷ swath width (in inches).
Use stakes and string or flags to clearly outline the plot. A flat, dry surface is ideal, as it helps you see the spray pattern without any overlap.
Step 2: Fill and Pressurize Your Sprayer
Fill the sprayer with clean water only – no chemicals should be used during calibration. Set the sprayer to your desired application pressure. If your sprayer has a pressure gauge or regulator, adjust it to the target pressure. If not, keep a steady pumping rhythm to maintain consistent pressure.
Once pressurized, you’re ready to move on to the application process. Consistency is key here to ensure accurate calibration.
Step 3: Time Your Application
Walk through your marked test plot at a steady pace while spraying. Use a stopwatch to time how long it takes to cover the entire plot. To improve accuracy, repeat this step twice and calculate the average time. Stick to the same pace throughout; don’t try to adjust your speed later to correct for any errors.
Step 4: Measure Spray Output
Next, spray into a graduated measuring container for the same amount of time you recorded in Step 3. The amount collected in fluid ounces represents your application rate in gallons per acre (GPA). This works because there are 128 fluid ounces in a gallon, and the test plot is exactly 1/128th of an acre.
"The average ounces measured equals the number of gallons per acre. For example, 40 oz measured = 40 gal per acre." – Utah State University
Step 5: Calculate Your Application Rate
Using the spray output measurement, determine your coverage. Divide your sprayer’s tank capacity (in gallons) by the measured GPA to find out how much area you can cover. Then, multiply this by the pesticide label’s recommended rate to figure out the amount of product required.
If your measured rate doesn’t match the label’s recommendation, adjust accordingly. For small differences (within 10%), slightly modify your operating pressure. For larger discrepancies (over 10%), switch to a different nozzle size instead of altering your walking speed.
Tips for Accurate Calibration
To get the best results from your calibration process, it’s important to focus on consistency and avoid common pitfalls. These tips can help fine-tune your efforts by addressing operational conditions and frequent mistakes.
Keep Conditions Consistent
Maintaining a steady walking speed is crucial for accurate calibration. As Gary Roberson, Extension Specialist and Associate Professor, points out:
"Adjusting ground speed while walking is difficult to do and still maintain accuracy. It is better to walk at a consistent speed during all applications. Once you have established a comfortable and repeatable pace, try to maintain it. Do not change your speed to try to adjust output".
Pressure consistency is just as important. If your sprayer includes a pressure regulator, make sure to use it. For manual pumps, aim for a steady stroke count to avoid pressure fluctuations that could lead to uneven spraying.
Additionally, recalibrate whenever you switch application rates, products, nozzles, or encounter different terrain conditions.
Common Mistakes to Avoid
Several common errors can throw off your calibration efforts. Here’s what to watch for:
- Worn or damaged nozzles: A faulty nozzle can disrupt your spray pattern. Check the discharge rate regularly, and if it deviates by more than 10% from the manufacturer’s specifications, replace it. Never clear blockages with your mouth or hands—follow pesticide safety protocols and use tools like compressed air instead.
- Incorrect swath measurement: Misjudging the effective spray width, especially if overlap isn’t accounted for, can lead to gaps or uneven coverage. Make sure your swath width reflects the actual area being treated, including any necessary overlap.
- Neglected equipment maintenance: Leaks or blockages in hoses, spray guns, check valves, or strainers can undermine your efforts. Inspect these components carefully before starting calibration.
By addressing these common issues, you can improve accuracy and avoid unnecessary setbacks.
Choosing Nozzles and Test Locations
The nozzle and testing surface you select also play a big role in calibration accuracy. Always use the same nozzle tip and filter during calibration that you’ll use during application. This ensures the flow rate remains consistent between testing and actual use.
For spray pattern testing, choose surfaces that match your treatment area. For example, calibrate on turf if you’re treating turf. Dry, visible surfaces like blacktop are ideal for observing spray patterns clearly.
Conclusion
Main Points to Remember
Using the 1/128th rule for backpack sprayer calibration ensures precise pesticide application without complicated calculations. The simplicity of this method lies in its straightforward approach: the number of ounces collected directly translates to your application rate in gallons per acre.
Calibration accuracy is critical. A study conducted in 2009-2010 with 80 experienced applicators revealed a wide range of application rates – from 10 to 100 gallons per acre. Shockingly, only 11.25% of participants managed to stay within 10% of the target rate. Missteps in calibration can lead to errors, like applying over 25 quarts per acre instead of the intended 2 quarts. Such discrepancies underscore how calibration mistakes can have real and costly consequences.
By calibrating correctly, you can save money, protect the environment, and stay compliant with regulations. Proper calibration minimizes chemical waste, reduces contamination risks, ensures adherence to pesticide labels, and prevents the need for expensive re-treatments.
Further Training Resources
Mastering sprayer calibration is just one part of effective pest management. Online Pest Control Courses (https://onlinepestcontrolcourses.com) provides state-approved training programs to help you earn Continuing Education Units (CEUs) and Core Credit Units (CCUs) for certification and recertification. These courses cover essential topics like federal pesticide laws, formulations, environmental considerations, and integrated pest management strategies. Plus, they’re accessible on any device, and certificates are available for instant download upon completion.
"Proper calibration leads to positive results in pest management. Ultimately, that means savings in time and money made for you".
FAQs
How do I use the 1/128th rule if my spray swath isn’t 18.5 feet wide?
To use the 1/128th rule with a swath width different from 18.5 feet, you’ll need to adjust the spray course length. Here’s how: divide 340 sq. ft. (which represents 1/128th of an acre) by your swath width (measured in feet). The formula looks like this:
Course length (feet) = 340 ÷ swath width
By spraying this calculated length consistently, you can ensure accurate calibration no matter what your swath width is.
Should I change my pressure or nozzle if my GPA is off?
If your GPA (gallons per acre) isn’t accurate, it’s probably time to fine-tune your sprayer. Start by checking the pressure and nozzle size, as incorrect calibration can throw off application rates and disrupt spray patterns. To fix this, either adjust the pressure or switch out the nozzle to hit the target application rate and ensure consistent chemical coverage.
How often should I recalibrate my backpack sprayer?
Regularly recalibrating your backpack sprayer is key to ensuring it applies chemicals accurately. You should do this whenever you switch chemicals, change the nozzle, or notice uneven spray patterns. It’s also a good idea after long storage periods or if you suspect the sprayer isn’t delivering the right amount. This practice keeps the sprayer working properly and ensures consistent application results.